Page 107 - My FlipBook
P. 107
CAVITY PREPARATION FOR GOLD INLAYS 103
to pack the case for additional separation during the interim be-
tween making the pattern and setting the inlay.
Outline Form. The outline for inlay filling is much the same as
for other methods. Care should be taken that the buccal and
lingual walls are parallel, particularly the enamel portion of these
walls, as the wax pattern must move directly to the occlusal sur-
face in exit. It is equally essential in inlays that angles and sharp
turns in outline be avoided, particularly as they will not take in
the wax pattern and any defect in the casting exaggerates the
misfit.
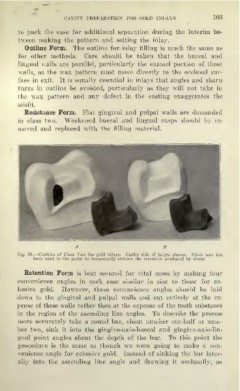
Resistance Form. Flat gingival and pulpal walls are demanded
in class two. Weakened buccal and lingual cusps should be re-
moved and replaced with the filling material.
Fig. 58.—Cavities of Class Two for gold inlays. Cavity side of inlays shown. Black wax has
been used in the molar to temporarily remove the retention produced by decay.
Retention Form is best secured for vital cases by making four
convenience angles in each case similar in size to those for co-
hesive gold. However, these convenience angles should be laid
down in the gingival and pulpal walls and cut entirely at the ex-
pense of these walls rather than at the expense of the tooth substance
in the region of the ascending line angles. To describe the process
more accurately take a round bur, about number one-half or num-
ber two, sink it into the gingivo-axio-buccal and gingivo-axio-lin-
gual point angles about the depth of the bur. To this point the
procedure is the same as though we were going to make a con-
venience angle for cohesive gold. Instead of sinking the bur later-
ally into the ascending line angle and drawing it occlusally, as